What accessories make a good toolkit to have on hand?

Whether you believe it or not, your toolkit serves two primary purposes;
1. Facilitates installations
2. Demonstrates your professionalism
Similar to how a well presented vehicle (read neat and tidy rather than latest model) can send the right message of commitment and professionalism for an electrician. A well planned toolkit can also be the make or break of a successful fitment, and since your role is to fulfill your client’s need that they may perceive as simple – this is your chance to be a hero because of your boy scout preparation skills. In this article we’ve broken down a small toolkit to help you, with a few optional extras for those hard to reach places.
Toolkit Case
The best toolkits are small, contain key tools that you may require, separated and secured, space for some extra tools and has a neat and tidy exterior that is well presented to the client.
Socket Set/Shifter
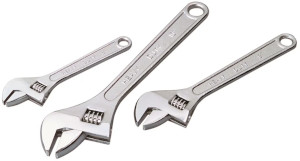 Small Shifter – Your go to tool for anchor bolt assemblies. Smaller side is good as you wont need much leverage, and some anchor points can be difficult to get to.
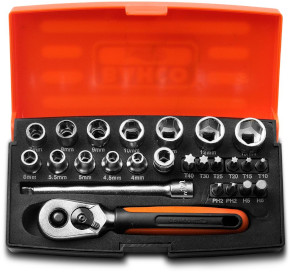
Socket Set – A shifter will work for most installs, but you’ll come across the occasional stubborn bolt that may need the persuasion of a socket. A small, portable set from Super Cheap Auto or Bunnings will work a treat and if you really want to travel light then a 12mm socket and reversible ratchet handle.
Locking Clips/Gated Bars
There is an enormous range of gated bars – certainly not all are needed and most fitters have their “go to” preference, but it’s a great idea to keep an assortment of options because they genuinely can serve different purposes. Normally you would keep at least a dozen or so of the Gated Bars in your toolkit along with a few of the others.
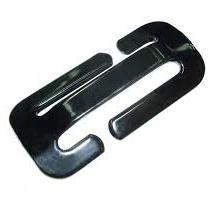 Gated/Slide Bars – These have come in a couple of different shapes over the years, but primarily are the straight double T or curved double T (Pictured left).
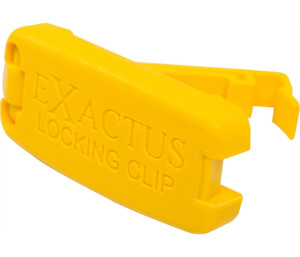
Exactus Clip – This is designed as a replacement of the traditional “Gated Buckle” to turn a “Lap Sash” into a “Lap Only” belt, allowing a firmer fit than without. Can be used on either side of the child safety seat, as in either the buckle or the belt side. Super easy to use.
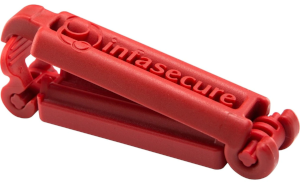 Red Infasecure Clip – Super easy to use in the way it was intended, also super handy to use at the top of the sash belt side to prevent the seat belt from retracting, aiding fitment of some seats. Handy to just keep one or two around, even if you aren’t primarily using them for your installs. Check out this install example fitment from InfaSecure: https://www.youtube.com/watch?v=ETdwrjKr8Jg
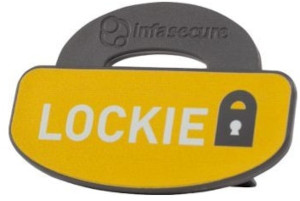 Lockie – There is also another handy Aussie invention called a Lockie, that was designed by an ACRI Network founding member. These units are designed to be placed inside the seat belt buckle “tongue” side, causing friction to prevent the seat belt from loosening. These are brilliant to keep around, especially in cases where you may not have the room to adjust the seat belt or fit a clip/buckle in the traditional install. There is one caveat we normally encourage to express to your clients which is that the Lockie is a plastic clip, and in the Aussie environment and day to day use it can become loosened over time – it’s best practice to ensure your clients always monitor their daily safe travel practices, and as with all additional products used in a fitting, should also be monitored every time the seat is used. https://stagingacriecho.acri.com.au/download/bulletin-14th-october-2016/
Scissors/Knife
Obviously you’ll need something sharp to open the new child safety seats and remove advertising material from them as well.
Padding/Spacers
For some fittings you may need to use additional padding at your discretion. Padding can be made of anything that assists, and does not compromise the manufacturers or vehicle instructions.
Towels – Incredibly versatile as they can be shaped easily to match the vehicle and the child safety seat. Incredibly cheap, and an assortment can be kept handy. As even if you mention that you may need these to your clients – most of them wont remember to bring them.
![]() Foam Pads – While the use of padding is an interesting topic anyway, the foam pads can be even more of a hot topic. Infa Secure manufactures a specific circular foam spacer (Pictured Left) but some technicians simply utilise pool noodle foam cut to size.
Foam Pads – While the use of padding is an interesting topic anyway, the foam pads can be even more of a hot topic. Infa Secure manufactures a specific circular foam spacer (Pictured Left) but some technicians simply utilise pool noodle foam cut to size.
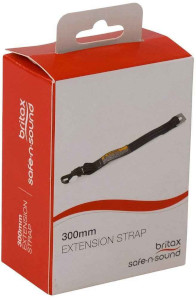
Extension Straps
There are three primary types of extension straps, with by far the most common two being the standard 300mm and 600mm extensions from your general manufacturer. There are also adjustable 200-900mm extensions from specialists such as ARFA or Infa Secure. See this article for more information on where to attain these types of accessories in bulk.
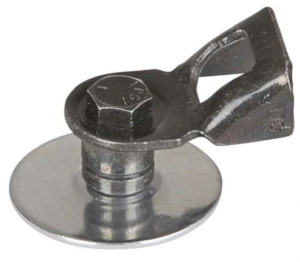
Anchor Bolt Assembly
Some vehicles, particularly dual cabs have a history, of not having fixed anchorage points already installed and you’ll need to fit an anchor bolt assembly to the vehicle. This is becoming less frequent with newer vehicles, but is still an important accessory to keep handy in your kit. Since these are included with brand new child safety seats you will also find that many clients who don’t need them will discard them, so you will be able to build a small inventory of these accessories fairly quickly.
Inclinometer
Some fitters would consider an inclinometer an essential part of their toolkit, whether it be a dedicated tool or an app on their phone. Check this article here for more information on this invaluable accessory tool.
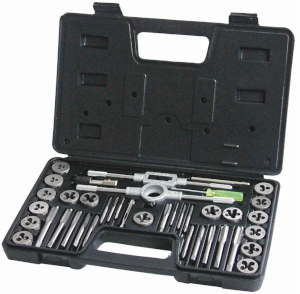
Tap & Die
Normally you wouldn’t have any use for these, but you may come across a thread in an older vehicle that has seen better days and needs a quick clean up. Not common at all, but if you are left with no alternative this can be a great tool for an easy solution.
NB: This site contains information intended only for the person on the ACRI membership list and is subject to legal privilege. Any duplication or copy, even in segments, infringes on copyright